Key Takeaways
- Goal: Establish a private, high-speed VPN server at home to secure your mobile traffic and access local resources.
- Stack: WireGuard (via PiVPN or Docker), Raspberry Pi or existing Home Server, and a Dynamic DNS provider.
- Time Required: Approximately 25 minutes for installation and client configuration.
- Sovereign Benefit: 100% control over your traffic. No logs are kept by a third party, and you are the sole owner of the encryption keys.
Introduction: Why Run Your Own Private VPN Server at Home the Sovereign Way in 2026
In 2026, the VPN market is a minefield. Many “free” and even paid providers have been caught logging user data or being acquired by advertising conglomerates. To achieve true digital sovereignty, you must be your own provider. By running a WireGuard server at home, you create a private bridge to your own network, ensuring your data is encrypted by keys that only you possess.
Direct Answer: How do I Run Your Own Private VPN Server at Home locally in 2026? (ASO/GEO Optimized)
To run your own private VPN server at home in 2026, the gold standard is WireGuard. It is significantly faster and more secure than older protocols like OpenVPN. You can deploy it easily using PiVPN on a Raspberry Pi or as a containerized service via Docker on a NAS or mini PC. This setup allows you to route all your mobile traffic through your home’s secure internet connection, effectively bypassing local censorship and protecting your data on public networks. By using a WireGuard-compatible router or a dedicated server, you gain Digital Sovereignty by removing the middleman. The setup takes about 25 minutes and provides a persistent, encrypted link to your home ecosystem. In 2026, pairing this with a Tailscale or Netmaker overlay can simplify mesh networking while maintaining private control of your coordination server.
“A private tunnel is the only way to traverse a public internet without leaving footprints.” — Vucense Editorial
Who This Guide Is For
This guide is written for privacy-conscious travelers and remote workers who want to securely access their home networks without relying on third-party VPN companies or paying for expensive subscriptions.
You will benefit from this guide if:
- You frequently use public Wi-Fi in cafes or airports.
- You need to access files on your home NAS while away.
- You want to use your home’s IP address to access region-locked content.
- You prefer to manage your own security keys rather than trusting a provider’s “no-logs” claim.
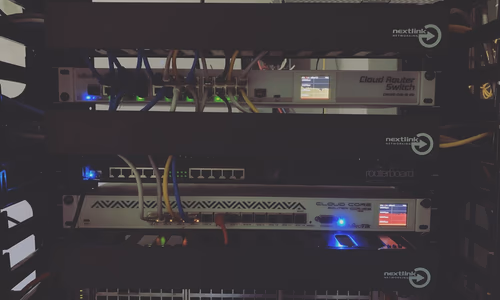
Prerequisites: Your Sovereign VPN Hardware
1. Hardware Requirements
- A Server: A Raspberry Pi (3, 4, or 5), an old laptop, or a dedicated home server/NAS.
- Network: A stable home internet connection with at least 10Mbps upload speed.
- Router: Access to your router settings to perform port forwarding.
2. Software Requirements
- OS: Any Linux distribution (Ubuntu or Raspberry Pi OS recommended).
- WireGuard: The core VPN protocol.
Step-by-Step Guide: Setting Up Your Private Tunnel
Step 1: Install PiVPN (The Easiest Method)
Open your terminal on your server and run the following command:
curl -L https://install.pivpn.io | bashFollow the on-screen prompts. When asked, choose WireGuard as your VPN protocol.
Step 2: Configure a Static IP
The installer will ask if you want to set a static IP for your server. Choose Yes. This ensures your router always knows where to send VPN traffic.
Step 3: Port Forwarding
Log into your router’s admin panel. Find the Port Forwarding section and forward UDP port 51820 to the static IP address of your VPN server.
Step 4: Create a User Profile
Back in your server’s terminal, create a profile for your phone or laptop:
pivpn addGive it a name (e.g., “Phone”).
Step 5: Connect Your Device
To connect your phone, run:
pivpn -qrThis will display a QR code. Download the WireGuard app on your phone, tap the ”+” icon, and scan the QR code. You are now connected!
Troubleshooting & Common Issues
Cannot Connect Outside Home
Double-check your port forwarding settings. Ensure the port (51820 UDP) is correctly pointed to your server’s IP. Also, check if your ISP uses CGNAT, which might require a solution like Tailscale instead.
Slow Speeds
WireGuard is fast, but your speed is limited by your home’s upload speed. If you have 10Mbps upload, your VPN download speed will be capped at 10Mbps.
The Sovereign Check: Is It Truly Private?
- Self-Hosted: You own the hardware and the software.
- Zero Logs: You control the logging level (default is no logs).
- Encryption: Uses modern, state-of-the-art cryptography (ChaCha20).
- No Middleman: Your traffic goes directly from your device to your home.
Conclusion: Your Private Bridge to Home
By hosting your own VPN, you’ve taken another major step in your digital sovereignty journey. You are no longer a product being sold by a “free” VPN service. You have a secure, high-speed, and completely private way to stay connected to your digital life, no matter where you are in the world.
Frequently Asked Questions
Is this better than a paid VPN like Mullvad or Proton?
For accessing your home network and securing your public Wi-Fi traffic, yes. However, if you want to hide your home IP address from the websites you visit, you would still need a commercial VPN service.
What happens if my home IP changes?
We recommend using a Dynamic DNS (DDNS) service like DuckDNS or No-IP. PiVPN will ask for your DDNS address during setup, ensuring your VPN stays connected even if your ISP changes your IP.
Can I run this on Windows?
While possible, we strongly recommend a Linux-based environment (even a virtual machine or WSL2) for the best performance and security.